Using Fireworks MX 2004:
Comparing Compression Schemes & Using the Optimize Panel
The intention of these exercises is to demonstrate to you the benefits of using one compression format over another: JPEG or GIF. What you should find out is that, generally speaking, for photographs JPEG will produce a superior image with a smaller file size; images consisting primarily of areas of solid color (such as most logos, comics, images of text) GIF is usually best.
Your objective is simply this: you want to determine the file format (JPEG or GIF) and the settings for it that will provide you with an image that looks acceptable and also has the smallest possible file size (in KB).
Photograph Optimization:
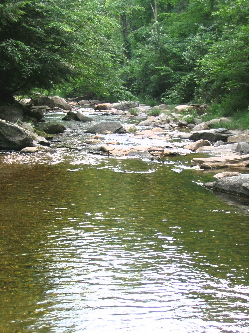
- Right click on the image above and select Copy. Save the file somewhere on your hard drive where you can locate it again if necessary.
- Start Fireworks (download it from their site if you haven't already and remember to download ONLY Fireworks, not Dreamweaver or Flash at this time) nor Macromedia Studio (the package of all three and other stuff),.
- In Fireworks go to (using the menus) File -> New
- A dialog box will open with a suggested size. This should be the exact size of the image you just copied!
- Click OK
- A new file will open.
- In the Fireworks menu select Edit -> Paste (or use the keyboard: Ctrl-V)
- In the Fireworks toolbar, be sure the Pointer Tool (black arrow) tool is selected.
- In the toolbar above the image, select the button 4-Up.
- You will see four views of the same image.
- They are all the same at this time. Fireworks allows you to change each of them independently so that you can compare optimization (compression) settings in order to select the best one.
- First, click on the image in the upper right corner.
- It should now have a black border around its quadrant, indicating that it is currently selected.
- Note that an initial estimated compressed file size is displayed (ending with the letter K for Kilobytes) directly under the image along with the amount of time it would take for the file to download with a 56kbps modem (the connection speed can be changed using Preferences -> Status Bar).
- Open the Optimize panel using the menu: Window -> Optimize
- In the Optimize panel, in the pull down menu at the top of it, select JPEG - Better Quality if it is not already selected.
- Using the Quality slider, try different settings.
- The effect of the settings will be visible in the image you selected.
- Note that the setting you select will not affect the image until you release the slider (to do this, click away from the slider).
- Your task is to make the download time as brief as possible and yet maintain an acceptable level of quality.
- You are striving for an optimal balance of file size and image quality.
- Keep in mind that the criteria for what constitutes acceptable quality is usually a very subjective decision. There is no correct answer.
- To get a closer view:
- Select the Zoom tool at the bottom of the Tool
panel. The icon looks like a magnifying glass. If you don't see
the Zoom tool, it is possible that it is hidden behind your Windows
Task Bar. If so, try this:
- To temporarily get the Zoom tool, using the hand that you don't use for your mouse hold down the Ctrl-Spacebar keys on your keyboard. Keep those keys down with the one hand as you move your mouse with your other hand. Move your cursor over the image. Then click with your mouse to get magnification. When you release the keys, the cursor should return to the pointer tool.
- To reduce magnification, do the same thing, but also press and hold down the Alt key (Ctrl-Alt-Spacebar). On the Mac, use Command-Option-Spacebar.
- There is also a percentage magnification menu in the lower right corner of the file window that you can use if you wish.
- Select the Zoom tool at the bottom of the Tool
panel. The icon looks like a magnifying glass. If you don't see
the Zoom tool, it is possible that it is hidden behind your Windows
Task Bar. If so, try this:
- If you have been able to select the Zoom tool, click on the image to enlarge it.
- To reduce the magnification hold down the Alt key (Windows) or Option key (Mac). To return to normal magnification, double click the Zoom tool icon in the Tool panel or click Ctrl-1 (that's Ctrl and the number "one") on the keyboard.
- Now select the quadrant in the lower right area. After selecting it, the quadrant should be surrounded by a black border indicating that it is selected.
- Return to the Optimize panel.
- In the Optimize panel, in the pull down menu at the
top of it, select GIF Web Snap 256.
- Check the image quality and file size. Does the image look posterized? (Posterized means having bands of a few solid colors rather than a gradual transition between colors.) It should be particularly noticeable in the sky if you see it at all.
- Reduce the file size by reducing the Colors used. Do this using the Colors menu in the Optimize panel.
- The fewer the colors, the likelier it will be to see the posterized look.
- You can manually type in an amount, however GIFs cannot hold more than 256 colors.
- Try increasing the Dither percentage.
- Dithering uses dots of colors from the GIF file's palette of available colors to attempt to mimic other colors that were in the original image but are not available now due to the limit on colors.
- Which do you prefer, gif or jpeg? Its' a subjective judgment. However, generally photos are better off as jpeg.
- Send me an email with the file type and settings that you prefer:
- In the email, enter the subject as: Exercise JOG number 1
- Then answer these questions:
- Do you prefer jpeg or gif.
- If you prefer gif, tell me how many colors you believe are the minimum needed for an acceptable image.
- If you prefer jpeg, tell me the quality level you believe is the minimum needed for an acceptable image.
- There is no right or wrong answer. You only need to demonstrate that you have done the work by providing settings somewhere within the range of possibility.
Solid Colors Optimization:
- In Fireworks, go to: File > New to create a new file.
- In the New Document dialog box:
- Specify a Canvas Size of 200 by 200 pixels.
- Set the Resolution to 72 dpi (this is what you should always use for Web images).
- Select Canvas color -> Custom
(Note: Canvas is the name Fireworks uses for the background.) - Keep the canvas color light.
- In the Toolbar, select the Text tool (it uses the icon of the letter A) then click anywhere on the canvas.
- Type your first name.
- Then select the letters of your name by click-dragging over them or double clicking on them.
- You now have a choice of using either the Properties panel or else opening the Text Editor (in the menu: Text -> Editor), which is what I prefer.
- Either way, using the controls available to you in either location:
- Select a font such as Helvetica or Arial.
- Make the text bold using the B button.
- Make the text a dark color but not black.
- Modify the text size so that your name is as large as the canvas.
- Then select the Pointer tool (the black arrow tool).
- To reposition the text, use the Pointer tool to click and drag it into position.
- If you want to reedit the text, just double click on it. Then be sure to select the text before you try to modify it.
- Next, at the top of the file's window, select the 4-Up
button again.
- Note: if you can't see the text any more, select the Hand tool, then click-drag on the canvas until you bring the text into view. You can also use the spacebar on the keyboard to give you the Hand tool temporarily.
- Reselect the Pointer tool when done.
- Now experiment with different optimization settings in the same way
you did previously.
- Try both GIF and JPEG using the top menu in the Optimize panel.
- Get the file size as small as possible and yet still maintain acceptable image quality.
- Check the image quality and file size as you experiment.
- It is important to note that text should never be judged in Fireworks at anything other than 100% magnification.
- Which do you prefer, gif or jpeg? It is again a subjective judgment. Generally, images of this type are better off as gif files.
- Send me an email with the file type and settings that you prefer:
- In the email, enter the subject as: Exercise JOG number 2
- Then answer these questions:
- Do you prefer jpeg or gif.
- If you prefer gif, tell me how many colors you believe are the minimum needed for an acceptable image.
- If you prefer jpeg, tell me the quality level you believe is the minimum needed for an acceptable image.
- There is no right or wrong answer. You only need to demonstrate that you have done the work by providing settings somewhere within the range of possibility.
Conclusion:
You do not need to send me any of the files you worked on, just inform me in separate emails as specified of the settings that you arrived at.
Both of the above examples demonstrate that the choice of compression scheme is dependent on the image subject matter.
updated 10/25/04
© 2004 Dan Hitchcock Vaughan and its licensors. All rights reserved.